


Humidifiers and Chameleon Enclosures
By Tom Routhouska
Citation:
Routhouska, T. (2005). Humidifiers and Chameleon Enclosures. Chameleons! Online E-Zine, October 2005. (http://www.chameleonnews.com/05OctRouthouska.html)
Utilizing a humidifier can be an excellent way to add humidity to a low humidity environment. Depending on the species of chameleon you keep and the region you live in, meeting the required humidity and then reasonably sustaining it can be a challenge. Like any other tool used for chameleon husbandry, time is needed to maintain the system along with a significant danger factor if it's not kept clean. Condensation can easily accumulate within the PVC which can foster the growth of bacteria and fungus among other things. So it's very important to clean/disinfect all parts of the system on a regular basis. There a couple of ways to plumb the humidifier mist to the tank/cage which are discussed in this article.
Tools Needed:
The tools really depend on what you plan on using (PVC, Pool hose, or a combo of the both). It would be best to read the article first then re-address the tools/supplies list to determine what you will need.
Exacto knife / box cutter (Pool Hose)
Sharpie for marking lengths (Both)
Hot glue gun (Both)
Hack Saw / table saw / light saber (PVC)
Work bench with vise or "C" clamps (PVC)
Measuring tape (PVC)
Drill/Dremel with assorted drill bits (possibly both)
Supplies:
Humidifier
Pool Hose or PVC
PVC pieces (adapters / elbows / etc.)
PVC end caps
Digital timer (possibly 2 of them is you use a fan)
Duct tape (possibly both)
Silicon (Both)
The humidifier:
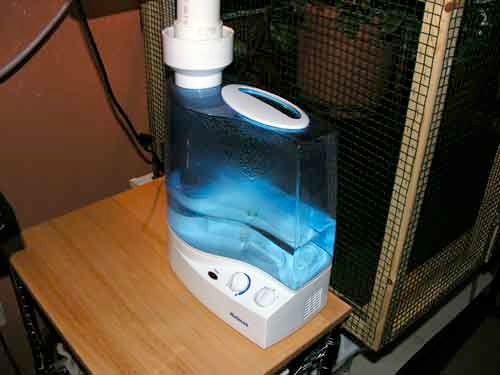
I only have experience with the current humidifier that I use for all my cages and leaf chameleon tanks (Holmes 2.8 Gallon Ultrasonic Humidifier HM-485). There are many brands, styles, and price ranges to choose from. Some even allow you to control the temperature of the mist. My first unit was purchased last November, so it's been running for around 10 months without issue.
When choosing a humidifier, probably one of the first things you should look at is how easily can you hook up a hose or piece of PVC to the humidifiers reservoir? Some humidifiers have oddly shaped exhaust ports which would either make it impossible or very difficult to attach PVC/hose to. Also keep in mind that some humidifiers have a cap/nozzle fixture that directs the mist which CAN BE REMOVED (such as the humidifier that I currently use) exposing the main port which is ideal for this application.
The next item to look at which is probably just as important as the first is the technology behind the humidifier. There are several methods to create humidity which is listed/described below.
-
•Ultrasonic
Creates a visible cool mist by means of ultrasonic sound vibrations. This is the same technology used with the foggers that you typically find in a pet store. -
•Cool Mist
Produces a visible cool mist by means of a high speed rotating disk. -
•Evaporative
Uses a fan to blow air through a moistened absorbent material, such as a belt, wick, or filter. -
•Steam
Uses a heating element or electrodes to create a warm mist.
Your best bet would to probably use either an ultrasonic or cool mist humidifier. The evaporative types will work I guess but they don't create the visible mist which is typically desired. Most of the evaporative type humidifiers don't have a suitable port for PVC/hose either. The steam types may be a good choice for folks up north but they will cost more. For my environment, 90% of the time I am going to want cool mist flowing into the enclosures. Also keep in mind that any heated mist will promote bacteria/fungus faster then cool mist.
Paths to take:
Pool Hose Method
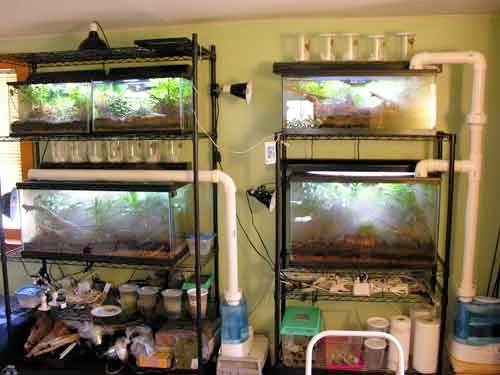
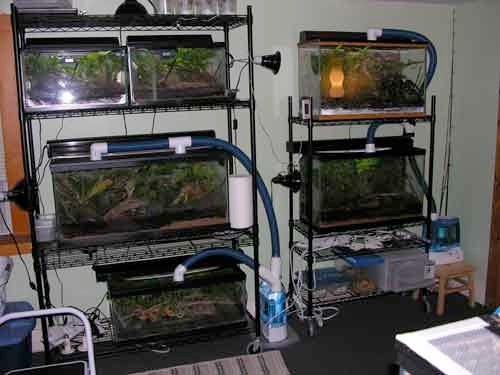
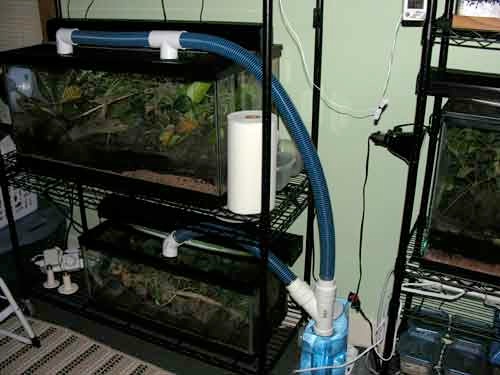
Pool hose is something new that I have implemented with my leaf chameleon enclosures but could also be used with all screen cages. I typically use one humidifier for a couple leaf chameleon enclosures. So when I used PVC, I had to stack PVC pipes on top of each other in segments which are basically held to together by weight and balancing. I segmented the sections only because I didn't want this huge PVC structure that I needed to deal with when cleaning or taking it down for the night to dry out. This worked well but if my cat got rowdy or I walked by fast enough the whole structure would fall. This got tedious after a while so I decided that flexible tubing that I could "plug" into PVC adapters which were fixed to the screen tops was my best bet.
Here is a pic of the old setup.
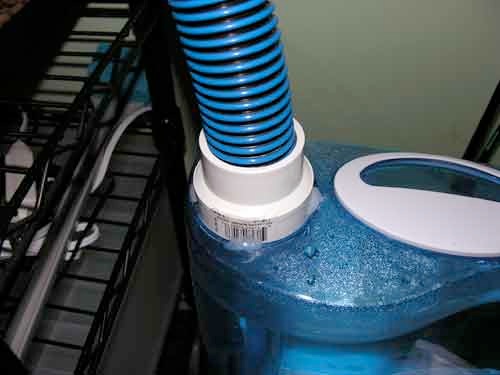
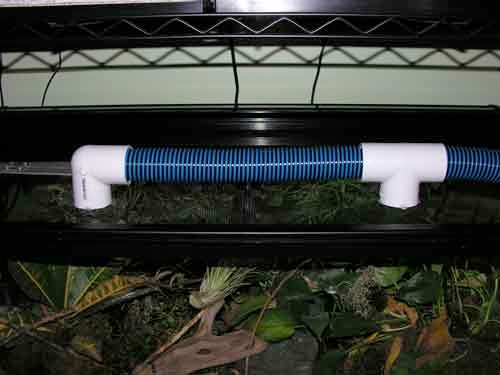
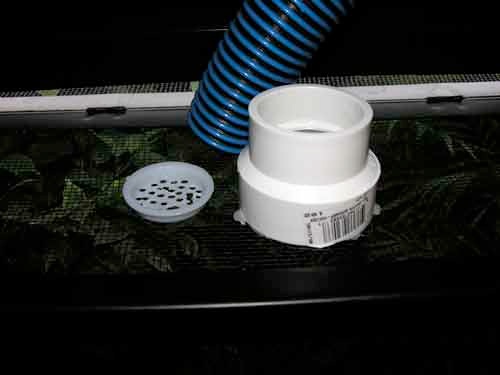
Lowe's has some very nice, well made pool tubing that was perfect for 1 1/2" PVC fittings. Despite its spiral appearance, the inside of the hose was smooth - so that meant water from condensation couldn't really pool in any crevices. As you probably already know, pooling/standing water is ideal for bacteria and other annoyances. The hose along with PVC end pieces was an ideal way to plumb the mist into my enclosures.
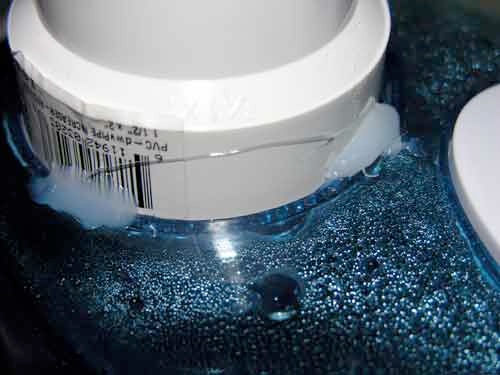
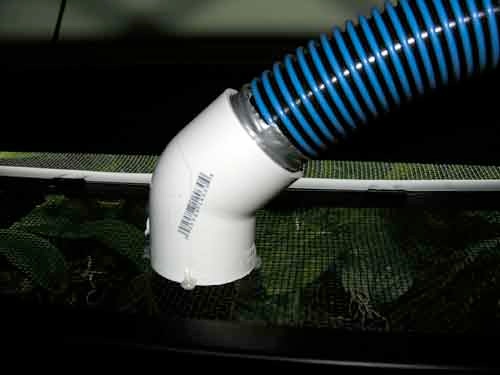
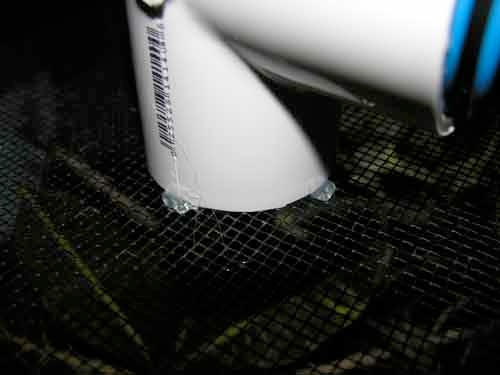
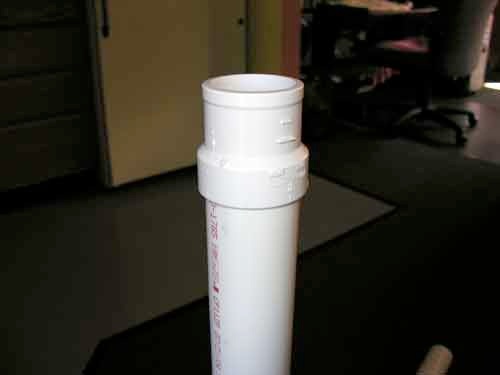
One PVC piece was glued to the humidifier reservoir with silicon to keep it air tight. I then used a few dabs of hot glue around the PVC to reinforce it. Silicon alone will not keep the fitting on the humidifier, eventually it will pop off so that's why the hot glue is needed. Next I hot glued some PVC fittings to the front half / center of the hinged screen tops. I just used 4 dabs of hot glue which makes it relatively easy to remove if you make a mistake positioning it (a quick jerk will pull it off). Keep in mind that the piece should be glued fairly close to the front or else it will hit the fluorescent light fixture when lifting the screen top. I played around with the fittings here - some were just straight plug-ins while others had angles, and even "T" pieces (refer to pics).
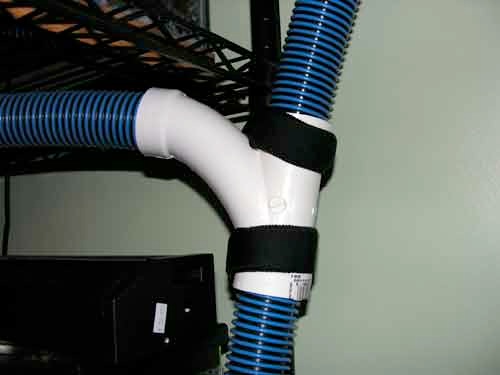
There are a couple obstacles to overcome when plumbing one humidifier to 2 enclosures. Firstly, you will need a "Y" PVC piece to direct the hose to 2 areas. I either hook the "Y" piece straight to the humidifier tank (silicon / hot glue) or add the piece up the line a bit. The other trick is to evenly distribute the mist to both enclosures. When running the humidifier, the mist will take the path of least resistance - so basically one tank will get the mist and the other one wont. Once you identify the tank that's getting all the mist, you need to somehow restrict the mist in some way which in turn forces it to the other enclosure.

This is not too bad to overcome. In the same section of the hardware store where you find the PVC fittings, there should be some PVC end caps. These are cheap so grab a bunch of them. Make sure the cap fits inside of the end fitting you have attached to the screen top(s). Start off by drilling about 4 smalls holes in the cap, then place the cap in the fitting where ALL the mist is flowing into. This will restrict the mist to the point where it's going to want to flow into the other enclosure. You may need to "tune" the cap by drilling more holes, but it shouldn't take long to complete. If you drilled too many holes then start off with a new cap or close up a hole or two with a small piece of duct tape.
The hose itself is NOT glued anywhere and you don't want it to be. You need to be able to pull the hose apart for cleaning and at the end of the day to give it a chance to dry out overnight. The hose fits pretty well in the PVC adapters but occasionally there may be a connection where you see some wisps of mist escaping. To fix this, just wrap a bit of duct tape around the end of the hose to create a better seal.
Comparing this setup with the all PVC method, this way was SO MUCH EASIER and took much less time to construct. It was a bit more expensive though - pool hose costs more then PVC. Worth every penny though since I didn't have to pull out my work bench and hack saw. Then have to vacuum up all the PVC shavings. Yes, I am bit lazy - but laziness promotes ingenuity!
This method will work just fine for an all screen cage as well. You could easily hot glue the end pieces right to the screen on the top of the cage (remember, just 4 small dabs from the hot glue gun) - then hook up the tubing. I am really not a big fan of this method since it dumps all the mist into one area of the cage. In my opinion, if you are going to take on this project then you might as well devise a way to distribute the mist across the entire cage. I will discuss this option in the next section.
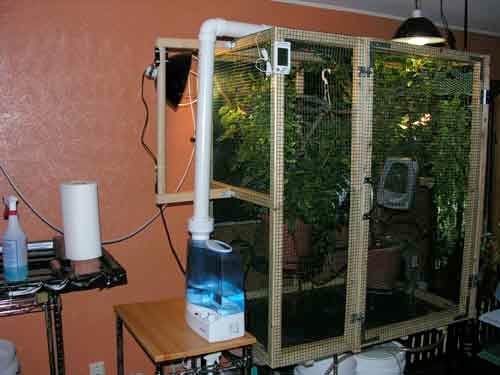
PVC Method
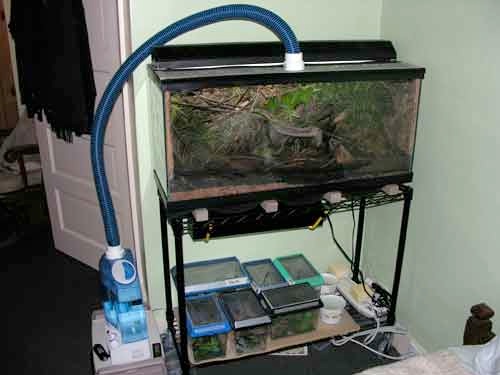
This method is the most time consuming to do, but if you want to evenly distribute the mist across the entire screen cage then this may be your best option. The procedure for the humidifier reservoir is the same, use silicon to attach a PVC adapter/fitting then reinforce it with hot glue. I used 2" PVC for my veileds cage but you could probably get it done with 1 ½" too. I'm sure there are some pros/cons on which size PVC you use but I don't have the time or desire to research it. Either size should work fine.
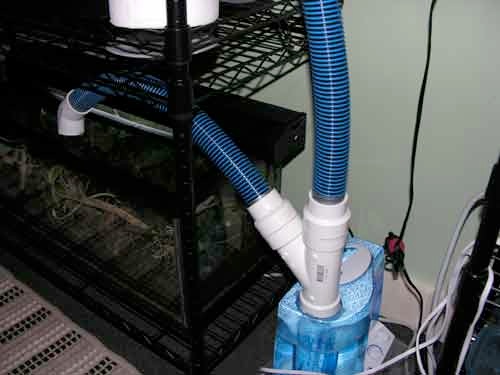
Pictures always say a thousand words so take a look at the pics below. Again, no glue is holding the PVC pieces together - you need to be able to pull everything apart for cleaning and the nightly dry-out process. The main pipe that leads to the humidifier has a small adapter on the end to make a perfect fit to the piece glued to the humidifier. The weight is sufficient enough to create a seal and prevent mist from escaping - so no gaskets or rubber washers are needed here.
Cutting the PVC can be tricky and I always cut the piece a tad big then trim it (I can NEVER cut it perfect the first time). When taking measurements, you need to keep in mind that the main pieces slide into the adapters/elbows/whatever a couple inches - so you need to compensate for that. Also keep in mind that the fittings themselves add a bit of length to everything as well. It's also important to make straight/flush cuts. Since you have couple of inches to work with in the adapters, you can play around to make things fit/lineup correctly - but you are risking leaks by doing that. It's best to have everything nice and snug.
One suggestion is to just make some general measurements (on the large size), put everything together nice and snug, set it all up, then measure how much you need to remove from the main pipe(s). So if the piece in question is 2 inches higher then it needs be, then just saw off 2 inches and you should be set. Trying to measure everything perfect the first time is a lost cause IMO (unless you are Bob Villa), the "general measurements on the large size" will save you time in the end - trust me.
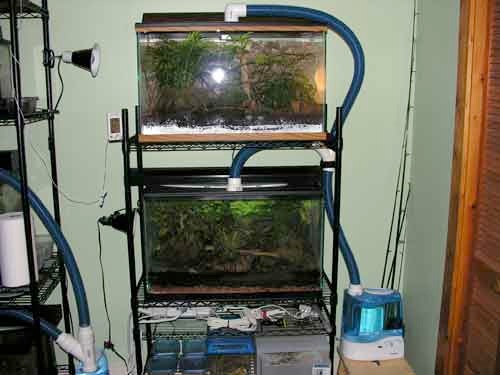
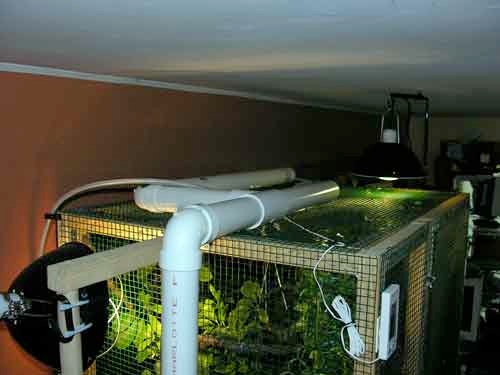
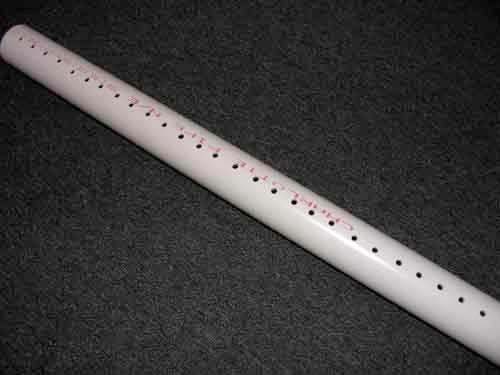
This setup has a fork like construction, one prong falls short of the other to allow for the top mounted Powersun bulb. Mist is delivered through small holes on the underside of the structure. The trick to having the mist come out all holes (including the ones on the end) are the hole sizes. Using a hand drill, drill small holes (and I mean small - drilling holes too big could ruin that section of the pipe) a couple inches apart or so the entire length of the pipe(s) and test to see how it does by turning the humidifier on. If the holes are too small then the mist will back up to the reservoir and start to seep out where the main pipe and tank adapter meet. Holes too big won't create enough resistance for the mist to make it to the far holes. So if it's backing up, then re-drill the holes a bit bigger until mist comes out all the holes and doesn't seep out around the pipe/humidifier connection. If you accidentally drilled holes too big then you could tune the pipe by covering up some of the holes with duct tape.
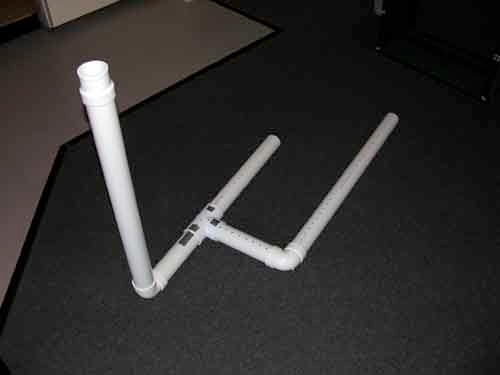
The very ends of the fork structures have 2" end caps that I glued in place with silicon.
Combination of the both method
If your plans are for a leaf chameleon / tank setup then I highly suggest the pool hose method. The one thing I don't like about my veileds setup is the main PVC pipe that runs from the tank to the top of the cage. When putting everything back together, I always have to fiddle with that piece so that its straight and has a bit of weight on the humidifier to keep a good seal. I haven't done it yet but I plan on replacing that tube with pool hose. So I can pretty much bypass the part that annoys me when putting everything back together.
Cleaning and Maintenance
I clean the pool hose/PVC, humidifier tank, and the humidifier base unit (but not the filter) every time the tank runs out - so this about every 7-10 days. You may need to do this more often, but I don't suggest waiting more then 10 days. I use a diluted Chlorhexidine solution to clean everything and then finally rinse everything in the bathtub with warm water. I'm sure a 10:1 water/bleach solution or something equivalent would suffice for cleaning/disinfecting as well. Put the pieces in a dry place until you are ready to set things back up. Try and avoid setting everything back up when the pieces are still wet.
The adapters glued to the screen tops get wiped down with a paper towel/disinfectant.
I can't stress enough the cleaning. The humidifier can be your friend but can easily be your foe if it's dirty. You truly risk a plethora of ailments with a dirty humidifier setup.
Many humidifiers utilize filters, follow the manufacturer's suggestion and replace them when needed! Might as well buy a couple when buying the humidifier - be prepared.
General Comments / Suggestions
-
•You are going to want a timer (preferable digital - see fan comment below) to run the humidifier. Especially if you are going to have multiple cycles throughout the day.
-
•When hunting for PVC adapters and fittings, bring the humidifier reservoir/tank to the hardware store so that you can physically match things up. Don't play the guessing game! Another suggestion which is a bit off topic is to really know what Lowe's, Home Depot, whatever has. I spent a Saturday morning going through every aisle at Lowes getting familiar with what they have. This helps with projects down the road ("Hey … Lowe's has this thinga-ma-jig that would work perfect for that").
-
•Fans: I have an oscillating fan in the room that has my leaf chameleon tanks. If you do the same (for true or leaf chams), you want the fan to go off when the humidifier(s) comes on. The fan will just blow the mist out of the tank/cage, so have the fan go off a few minutes before the mist comes on. Have the fan come back on maybe 10-15 minutes after the humidifier cycle goes off - this will give the mist time settle in the enclosure. So a digital timer for the fan and humidifier is really needed. Trying to perfect this with mechanical timers will drive you crazy.
-
•How long should I run the humidifier(s)? I can't really answer that. Depends on a lot of things such as what animal(s) this is for, the region, season, and current weather among other things. This is something you need to determine on your own. Really consider whether or not you even need a humidifier. One thing that is probably safe to say is let the enclosure dry out between cycles. You don't want the enclosure to be damp all day long (for most herps).
-
•Leaks: As long as the PVC pieces are fit snug together, you shouldn't have any. Condensation does drip out of the small mist holes in my veileds cage but that's kind of like an impromptu drip system in my opinion - and another good reason to keep things clean!
-
•Where can I buy a humidifier? Pretty much any department store like Wal-Mart will have them and sometimes its better to actually see the humidifier to determine if its going to work (able to hook up PVC/Pool hose to it). This is kind of a seasonal item too; some places may not carry them in the summer. Asking folks in the forums what they use is a great way to figure out which one to get too. I personally do a Google search and find the best price since I am happy with what I am currently using. You can typically get the Holmes model for around $35.00 US online.
-
•Keep in mind that some humidifiers may have a fan speed or a moisture output dials (or both). If you are "tuning" caps or pipes for multiple enclosures or the "span the mist across the cage" method then you need to adjust these dials appropriately. You may want to set the fan and/or moisture level dial(s) to high for two enclosures. My point is to set the dials THEN tune the cap/pipe. Changing the dial settings after the fact will most likely screw up the distribution of the mist.
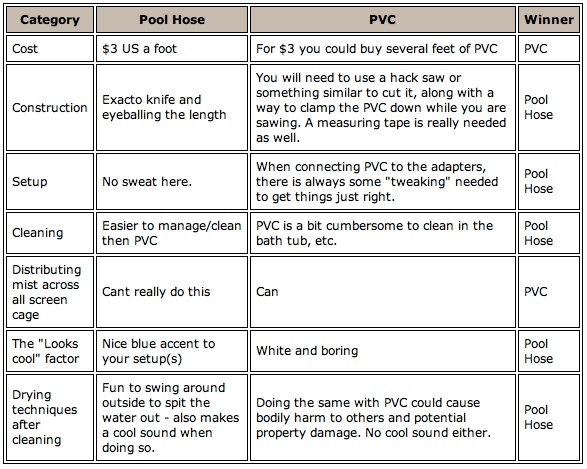
PVC / Pool Hose Match up:

Tom Routhouska


Join Our Facebook Page for Updates on New Issues:
© 2002-2014 Chameleonnews.com All rights reserved.
Reproduction in whole or part expressly forbidden without permission from the publisher. For permission, please contact the editor at editor@chameleonnews.com
