


Table Top Vivarium
By Ken Kalisch
Citation:
Kalisch, K. (2002). Table Top Vivarium. Chameleons! Online E-Zine, July 2002. (http://www.chameleonnews.com/02JulKalischViv.html)
Table Top Vivarium

Creative Housing Solutions:
A Tabletop Vivarium for Small Chameleons
Much has been said about the methods used in housing chameleons in captivity. Creating the best environment depends on many factors. These include the type of species, the specific needs of that species and the environmental requirements for each of them. The truth is there isn't one absolute way that will work for every species in captivity. There are so many factors to any given situation and conditions within each setting that must be taken into consideration for creating the preferred living situation for them.
In my years of keeping chameleons and various experimental attempts at housing many different species, I arrived at a basic tabletop structure that works well for small species such as rhamphoeleon and brookesia. The combination of a soil base and open screen is ideal in providing these semi-terrestrial chameleons with a natural environment and the soil-base has the benefit of providing increased levels of humidity and the screening allows for the exchange of air flow. This cage is set up to mimic the forest floor and low shrubs that many of these unique chameleons are found.
Constructing a tabletop cage system is relatively simple using the basic items found at almost any hardware store. I am using a 16" saucer as the basis for this article, but the size used is really up to you.
Here are the items needed:
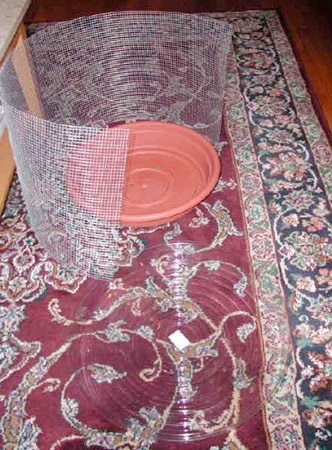
1- 16" plastic pot saucer base (to be used for the bottom)
1- 16" plastic pot liner (to be used for the top)
4 feet- 1⁄4 " hardware screening
4- Plastic bag twists
18"- Aluminum screening
Potting soil
Potting Charcoal
Assorted plants and branches
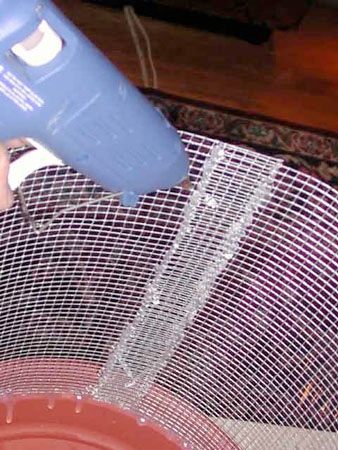
A Glue-gun and scissors
The process of assembly is relatively simple. Cut the hardware cloth to fit the inside perimeter of the pot saucer to fit snugly inside the shell, with a 1" overlap

Use some bag twists to hold the screen in the correct shape and size for the saucer base as well as the liner top, making sure that the hardware screen fits both the bottom and top saucer/liner tightly. Secure the hardware screen with the plastic bag twists.
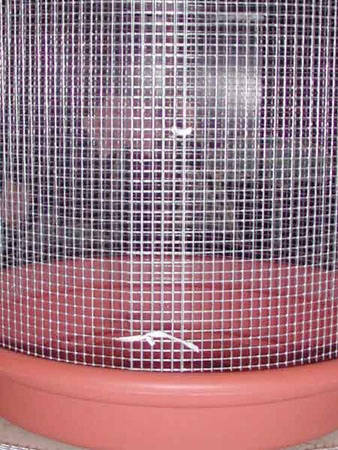
Using the glue-gun, glue the hardware screening into place along the bottom of the plastic shell.
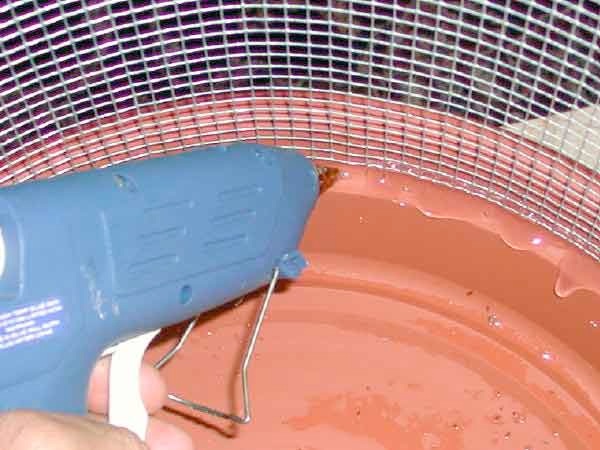
Continue on and glue the over lapping screening into place as well.
Allow the glue to harden and then add about 1 cup of activated charcoal to the bottom of the saucer.
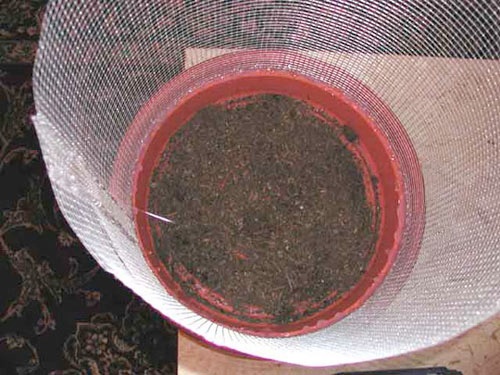
Over the charcoal, place enough potting soil to allow for planting of the plants chosen for the cage.
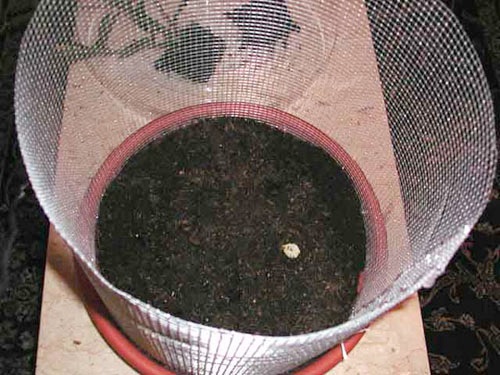
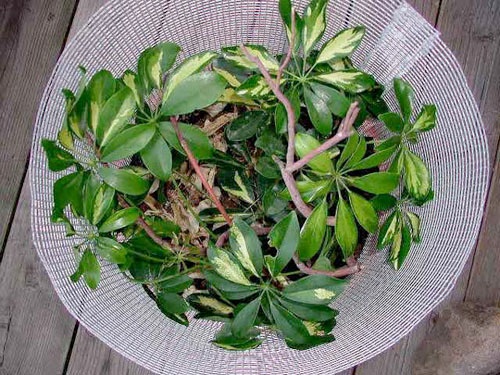
Next, plant the chosen plants, add the branches for perching/climbing and if you like, mosses and leaf litter can be also be added to create a more natural effect of the forest floor.
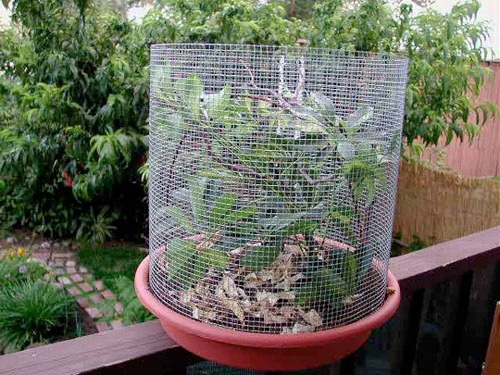
The final step is to make the top. Using the plastic pot liner, cut out the center section so that there is a 1" band around the edge to glue the aluminum screening to.
Cut a circle of aluminum screening to fit up to the inside edge of the plastic pot liner. Glue the screening into place. Once the glue is dry it is ready to be placed on top of the cage. The cage is now ready for the introduction of chameleons.


Ken Kalisch

Ken Kalisch has worked with over 40 species of chameleons in the last decade. He was co-editor of the Chameleon information Network, as well as being published by Advanced Vivarium Systems dealing with his experience breeding Calumma parsonii parsonii in captivity. He was the editor of this CHAMELEONS! EZine from March 2002-March 2004.


Join Our Facebook Page for Updates on New Issues:
© 2002-2014 Chameleonnews.com All rights reserved.
Reproduction in whole or part expressly forbidden without permission from the publisher. For permission, please contact the editor at editor@chameleonnews.com
